TRANSFORM YOUR LEARNING DESIGN FROM IN-PERSON TO VIRTUAL
It’s time to get started. Follow these five steps to quickly—and effectively—convert your instructor-led training (ILT) to a virtual format, without losing an ounce of instructional integrity.
![]()
1. Identify the key learning objectives of the existing ILT. What are the things you want/need people to know/be able to do?
![]() 2. Identify what existing ILT content is related to those objectives, then curate what to keep and what can go.
2. Identify what existing ILT content is related to those objectives, then curate what to keep and what can go.
![]() 3. Chunk the existing ILT content into logical “buckets” and think about how to sequence it. What should be taught first? Should each topic have its own session, or should some topics be combined?
3. Chunk the existing ILT content into logical “buckets” and think about how to sequence it. What should be taught first? Should each topic have its own session, or should some topics be combined?
![]() 4. Identify what content can be completed offline (think pre-work, reading, and assessments) and what content requires facilitation (presentation of concepts, discussion-based content, etc.).
4. Identify what content can be completed offline (think pre-work, reading, and assessments) and what content requires facilitation (presentation of concepts, discussion-based content, etc.).
![]() 5. If your content will require multiple sessions, think about what learners can do before and between each virtual instructor-led training (vILT) session. Try to build in accountability for these tasks (cohorts or partners working together), and build in contingencies in the learning for when this work does not get completed.
5. If your content will require multiple sessions, think about what learners can do before and between each virtual instructor-led training (vILT) session. Try to build in accountability for these tasks (cohorts or partners working together), and build in contingencies in the learning for when this work does not get completed.

MAKE IT EFFECTIVE IN A VIRTUAL ENVIRONMENT
Let’s say you had a group coming in for a full-day or multi-day session. How will that work in a virtual format? These best practices focus on designing your program to be more effective in a virtual environment.
Consider breaking day-long sessions into a series of shorter, 60- to 120-minute sessions. Your sessions may even be shorter. Keep in mind, however, that anything less than 60 minutes might be challenging if the session involves interactions, which can often require at least five minutes for people to settle in.
|
SMART TIP If you are breaking a large ILT program into multiple smaller vILTs, include a map or some visual indicator of learner progress and current position. |
Base decisions about group size on the content. If your content is largely knowledge-based, you can invite larger audiences, but don’t forget to use your tools (see “Choose Your Tools” below) to keep engagement high. If your content is performance-based (e.g., soft skills, leadership, coaching, etc.) and requires skills practice or discussion, keep the groups smaller so that you can spend time observing and giving feedback.

MANAGE YOUR TIME
Just as you would in an in-person training event, you need to design your agenda to accommodate the learning environment and the learners’ needs. These tips focus on managing time in a virtual learning event.
Assume that you will lose anywhere between five and 10 minutes while people arrive and get settled in to the technology, particularly if they are new to vILT. Plan accordingly.
|
Encourage participants ahead of time to call in from the appropriate environment. They should ensure they are in a quiet setting and that they have a strong internet connection. This will help you get everyone settled and ready to begin! |
Build in bio/refresh breaks every 45 to 60 minutes so that participants have time to get up and move periodically. Display a timer on-screen so that people know when to return.
Don’t underestimate how much time people will need to complete activities, particularly those involving group discussions or critical thinking exercises. Allow at least 10 minutes for groups to form, read the instructions and work, and another 10 minutes for you to debrief (you will need more than 10 minutes if you have a large audience with multiple groups).
Ensure appropriate debriefing time when necessary. It can be more challenging to manage large amounts of questions, feedback, or input when meeting virtually, so ensure adequate debriefing time is planned if your topic warrants it.

CHOOSE YOUR TOOLS AND DESIGN YOUR ACTIVITIES
Now that you have a sense of your design and agenda for your virtual training, it’s time to choose your tools and convert your in-person activities to ones that will work in a virtual format. It’s likely that you have an enterprise-wide virtual conferencing tool already (WebEx, Zoom, GoToMeeting), so it’s time to get familiar with your tool’s options. And go beyond!
Give people a chance to participate or be active as frequently as possible. Most virtual conferencing/training platforms have markup tools, polls, or whiteboards as a standard. Use these purposefully and often to get learners engaged and participating.
![]() Markup tools: If you are sharing some tips or best practices, pause and ask learners to circle or highlight the ones they agree with or can apply straight away.
Markup tools: If you are sharing some tips or best practices, pause and ask learners to circle or highlight the ones they agree with or can apply straight away.
![]() Poll: If you are discussing more abstract concepts, use a quick poll to ask learners what they might find easy or difficult to do.
Poll: If you are discussing more abstract concepts, use a quick poll to ask learners what they might find easy or difficult to do.
![]() Whiteboard: If you want to gather people's thoughts and ideas in one place, use a whiteboard and invite people to type onto it (note: you can use the chat feature, too, but these tend to blow up quickly, and comments can be lost).
Whiteboard: If you want to gather people's thoughts and ideas in one place, use a whiteboard and invite people to type onto it (note: you can use the chat feature, too, but these tend to blow up quickly, and comments can be lost).
![]() Chat window: Encourage participants to interact with each other via chat; some learners prefer the chat functionality over “raising their hand” to talk.
Chat window: Encourage participants to interact with each other via chat; some learners prefer the chat functionality over “raising their hand” to talk.
|
Include anonymous polls/whiteboards that enable you to track both engagement and understanding. Here are some examples:
|
Form breakout groups. Divide learners into cohorts, which are small groups that can check in for conversations or go off and do synchronous, deeper work together. Then have them come back as a larger group to debrief, share, and level-set. This helps learners feel more connected to the training.
|
Overcommunicate when you are setting up activities that involve breakouts. Unlike the classroom, where you can guarantee (to a certain extent) people’s attention levels, there is a much higher chance that people will be multitasking during vILT sessions. This becomes all too apparent when people are sent to their breakout rooms and suddenly don’t know what to do. Avoid this confusion and uncertainty by creating additional instructions that learners can access within their breakout rooms. |
Consider additional virtual collaboration tools. You may have ideas for converting activities that go beyond your virtual conferencing tool’s capabilities. Good news: There are many other tools that can be used for virtual workshops! Here are a few great options, from simple to more sophisticated:
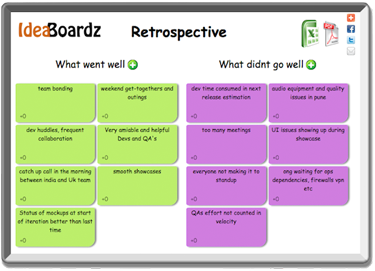
IdeaBoardz—A free app useful for sticky note-style brainstorming.
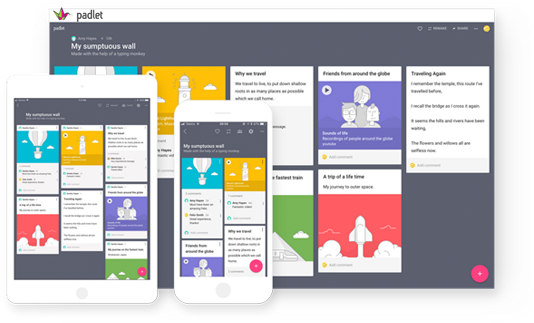
Padlet—An alternative to traditional documents, Padlet allows participants to co-create boards, documents, and pages that are easy to read, contribute to, and share.

Lucidchart—A paid service that allows for quick documentation of process flows during a conversation. There is a free version with reduced features.
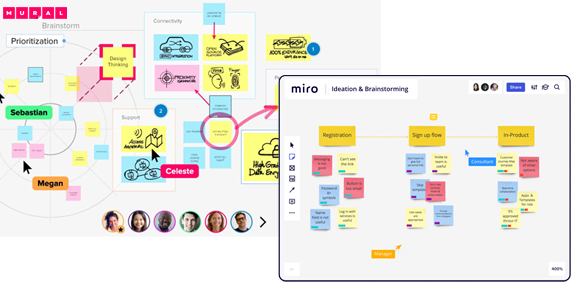
Mural and Miro—Advanced collaborative tools and virtual whiteboards for brainstorming and facilitation of design sessions.
|
Pre-teach how to use new tools in order to minimize tech stumbles. Consider running small group “tech checks” one to two days before the start of the virtual program. Also, consider your audience—how tech-savvy are they? You may need an additional session just to get them familiar with the tools. |

CONVERT YOUR LEARNING MATERIALS
Very likely you won’t need to completely reinvent the wheel here (did you just breathe a sigh of relief?), but you will want to consider what works best in a virtual environment. These best practices will help you narrow in on what changes and additions you need to make.
Support your content with more slides—lots of them. In ILT, we often say that you should only use PowerPoint to reinforce or support what you are doing or saying and, therefore, keep slides to a minimum. With vILT, however, you need to create more screens than you think to keep learners engaged.
|
Design your slides thoughtfully. Follow best practices on designing good visuals: Avoid lots of text on-screen, and use bold, dynamic, and compelling images or design wherever possible. |
Create an entrance slideshow or series of screens to display while participants are arriving. Use this space to provide housekeeping items as well as basic troubleshooting tips for the technology you are using.
Housekeeping examples:
- “Keep yourself on mute unless asked.”
- “If you have a question, use the chat.”
- “To raise your hand, click here.”
- “This session is being recorded. You can download it from here afterward.”
Troubleshooting examples:
- “To connect your audio, do this.”
- “If you are having difficulties with this, do that.”
Prepare facilitator guides and notes just like you would for ILT, and use them. Just be sure not to read directly from the notes/script, as this can sound unnatural.

GET YOUR FACILITATOR ONBOARD AND PRACTICE
You are now in the final stages of planning and prep for your virtual learning experience!
Ensure you have a strong facilitator. Consider that extensive train-the-trainer time may be necessary.
Practice your timing in advance of the session. It’s incredible how quickly time can pass in online sessions, especially once you start adding in all of the (very necessary) engagement devices.
|
Don’t go through the slides too quickly. Allow participants time to review what is being presented before moving on. |
RUN YOUR SESSION FLAWLESSLY
It’s showtime! Here are a few final best practices to keep learners engaged and your learning event running smoothly.
![]() Run the sessions with both a facilitator and a “producer” whenever possible. The producer can support the facilitator by monitoring and responding to the chat window, keeping an eye on timing, organizing and managing breakout rooms/sessions, and tackling any technical issues that occur during the session.
Run the sessions with both a facilitator and a “producer” whenever possible. The producer can support the facilitator by monitoring and responding to the chat window, keeping an eye on timing, organizing and managing breakout rooms/sessions, and tackling any technical issues that occur during the session.
![]() Turn your cameras on if possible. Cameras allow people to see body language and facial expressions, and they also help people feel like they need to pay attention. If an entire session with cameras isn’t possible, try to start the session with face-to-face introductions or an icebreaker before people turn their cameras off.
Turn your cameras on if possible. Cameras allow people to see body language and facial expressions, and they also help people feel like they need to pay attention. If an entire session with cameras isn’t possible, try to start the session with face-to-face introductions or an icebreaker before people turn their cameras off.
|
The facilitator(s) should have their cameras on throughout the entire session as a best practice. |
![]() Call out names as participants enter the meeting to welcome them.
Call out names as participants enter the meeting to welcome them.
![]() Record presentations so people can revisit them. Be sure to tell participants that the sessions are being recorded and how they will be made available afterward (this could be included in your opening slideshow with housekeeping items). Knowing there will be a recording allows participants to be fully engaged and not worried about taking notes/screenshots all the way through.
Record presentations so people can revisit them. Be sure to tell participants that the sessions are being recorded and how they will be made available afterward (this could be included in your opening slideshow with housekeeping items). Knowing there will be a recording allows participants to be fully engaged and not worried about taking notes/screenshots all the way through.